
Build a copilot running locally on IDEs by using ollama and liteLLM
- 24 Dec 2023 |
- 04 Mins read
In this post, we will walk you through some steps to build your own Copilot integrating to Xcode and VS Code, running locally on your device so you will not be worried about network or token prices while still being able to enjoy the benefits of AI supports for your productivity.
All of the tools used in this post are open source and free to use, including an open source LLM (Large Language Model) to help you generate code and other tools which can help you run that LLM as a local service and integrate it with your IDE such as Xcode or VS Code. At the end of this article, you can get the final bash file for running all steps at once including installing tools and setup running environment.
Table of content
- Prerequisites
- Steps to integrate with VS Code
- Steps to integrate with Xcode IDE
- Further steps
Prerequisite
- a MacBook with as least 16GB of RAM. This is recommended to have smooth experience as coding requires many tools opened concurrently, while running a LLM requires a minimum ~4GB of RAM.
- Python environment setup. It is recommended to have a Python version in Homebrew. If not, run this command in the terminal (assuming it is
zsh)
brew install python
- A downloaded LLM. We are going to use ollama to run our LLM locally as a service. It's quite simple to setup and use. We will go select a LLM from the library (or other sources with other formats such as GGUF). In this case, we use the codellama-7b model. Follow the installation guide to install ollama (just download the zip file, extract it and drag the file into Application directory)
We then download the codellama-7b and test it by this command
ollama run codellama
Wait for the download to complete and try the model by typing some messages:

Close the terminal. One important thing to note here is that the ollama server will run as a background service on port 11434 by default. Just verify that it's running by this command:
sudo lsof -i :11434

Steps to integrate with VS Code
VS Code is a very popular IDE which supports numerous extensions to boost productivity, especially in the domain of Copilot. Continue is a free but powerful extension which provides the ability of customizing the backed LLM for our needs, even with the remote or local LLM server like ollama. Checkout the document for its cool features such as code editing, code or file referenced as context, and more. By a few simple steps, we can integrate the ollama LLM server mentioned earlier to create a fully local Copilot experience.
Open the Extension tab from VS Code, search for "Continue" and install this extension. After that, open the configuration file to include our LLM server created in the previous steps:
- Step 1: Open the extension's "config.json" file at path: ~/.continue/config.json (we can quickly search and open the file by using Cmd + P hot key and typing the file name)
- Step 2: Include the following code inside the "models" array (assuming we are using the codellama LLM as shown earlier):
{
"title": "Code Llama",
"provider": "ollama",
"model": "codellama"
}
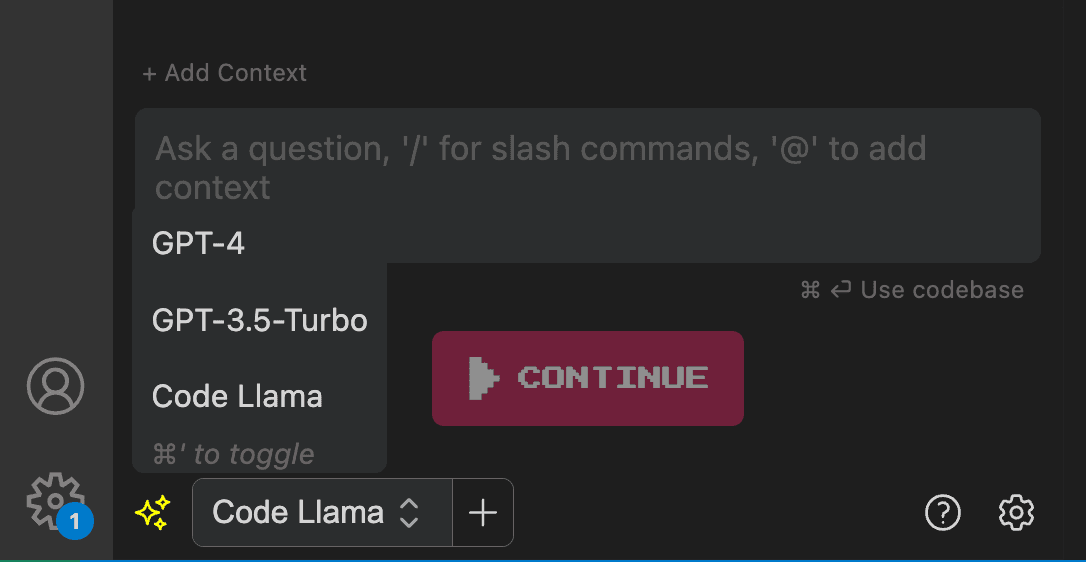
Save the file and restart VS Code, we can see the option to switch to our recently added LLM like below:
Please refer to Continue document for more details.
Steps to integrate with Xcode IDE
We will use CopilotForXcode as an extension for the Xcode IDE. It offers many functionalities similar to those found in Continue, but using a local LLM requires additional steps to make it works. This is due to the current version only supports OpenAI API or at least OpenAI compatible API.
To address this, we will need a proxy which can convert LLM server's API into OpenAI-compatible format. For this purpose, we will use liteLLM proxy.
- Step 1: Create a running proxy service. Let's start by defining a config.yaml file to enable it to work with our previously set up ollama server as a proxy server
- Install the liteLLM by this command:
pip install litellm
or use the below if it is python3:
pip3 install litellm
- Paste the following code into the newly created file:
model_list:
- model_name: codellama-litellm
litellm_params:
model: ollama/codellama
api_base: http://0.0.0.0:11434
api_key: "any"
Note that the api_base includes the address and port of the ollama server. Please refer to this for more details
- Start the liteLLM proxy server by the following command:
litellm --config ./config.yaml
- The server will run on port 8000 by default and you should see this:
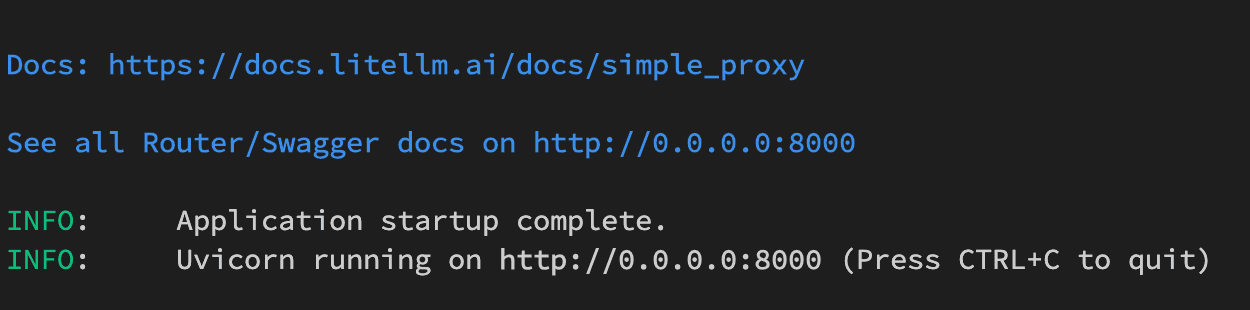
This 8000 port will be used to receive requests from the CopilotForXcode in the next step.
- Step 2: Install the CopilotForXcode and redirect its requests into our created proxy server in Step 1.
- Install and give the needed permissions for the extension as mentioned in their document
- Open the extension and configure the local server:
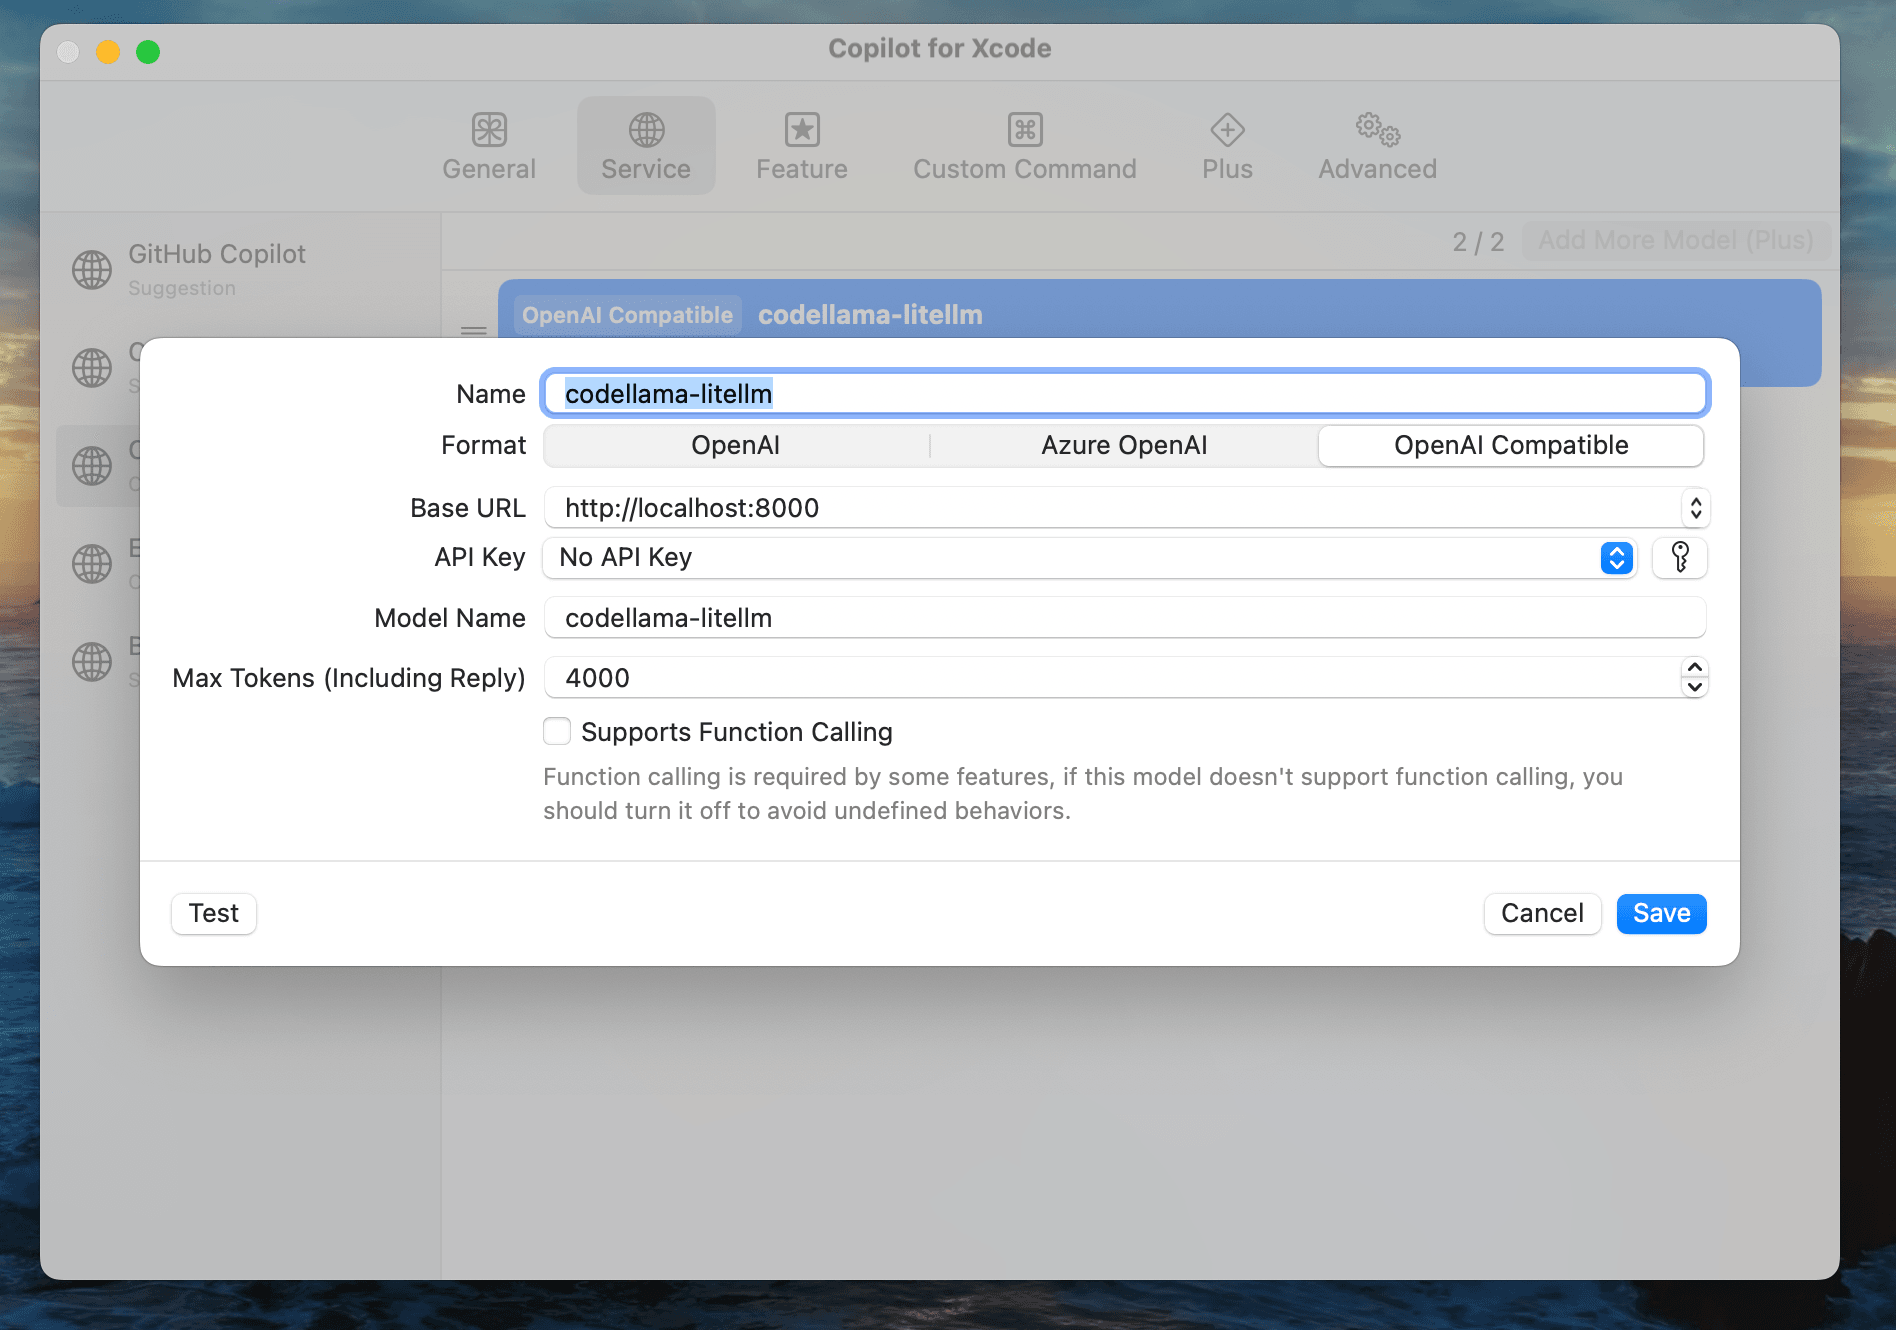
Note that we use localhost instead of 0.0.0.0 to avoid the error for App Transport Security policy.
- We can test the request by clicking the Test button and check the response:

- Then click the Save button and back to our Xcode IDE and start using the Copilot!
For simplifying the steps to start the server every time we do coding from now on, let's put them into a simple bash script:
#!/bin/bash
# Start the ollama server in a new window
(ollama serve &)
# Wait for the server to start listening on port 11434
while ! nc -z localhost 11434; do sleep 0.1; done
# Run the litellm command in the current window
litellm --config ./config.yaml
Finally, you can get the bash file for running all the above steps here. Every time we need to run that server, just running that bash file and we're good to go!
Further steps
This approach has some limitations:
- Need more efforts to configure for each LLM, despite many LLM server like ollama does support importing from other file formats such as GGUF
- The offline LLM won't be up to date with newest changes & improvement for technical stuffs and it relies on every update/fine-tuning of the current model to get latest updates
Besides that, it's worth to try and it's also good enough for increasing our productivity without being worried about the token costs, etc ... We can think about the way to support Internet searching/crawling based on our needs to make our Copilot more useful.